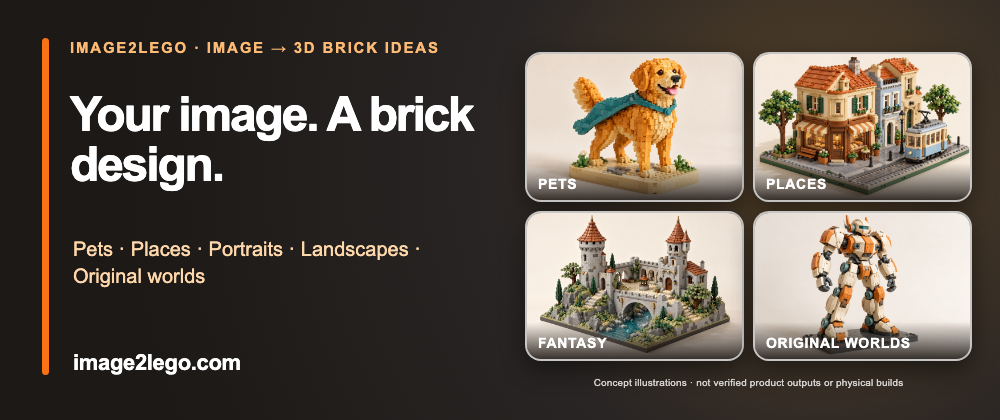
This guide was drafted with AI assistance and checked against the current Image2LEGO workflow and the linked format documentation. The illustrations are original AI concept art, not screenshots of generated results or physically tested models. The advice is editorial guidance, not a measured success rate.
The useful question is not whether an image can be made to look like bricks. It is which features must survive simplification, what a single view cannot tell us, and what needs checking before ordering parts.
Image2LEGO lets you upload a reference image, inspect an editable 3D brick-model proposal, review its steps and parts, and export project data. That workflow can begin with many subjects; it does not guarantee a stable physical model for every photo. If you are new to the tool, first read the six-step upload guide.
Choose a clear subject and decide which two or three features matter most. A second permitted view can help with hidden surfaces. Ask for a recognizable design proposal first, then refine one issue at a time.
1. Portraits: preserve the person, not every pixel
A portrait is often recognized by its overall head shape, hairstyle, glasses, clothing colors or pose. Fine skin texture and subtle lighting do not translate neatly into block geometry. Begin with a well-lit three-quarter view, then specify which features must remain recognizable. For a small model, a stylized bust may communicate more than a literal full-body copy.
Prompt direction: “Create a stylized brick bust from my permitted portrait. Keep the hairstyle, glasses and blue jacket; simplify facial details and give it a display base.” Review the back of the head and any overhanging hair, because the photo does not reveal all of that structure. See the portrait design guide.
2. Pets: likeness depends on pose and silhouette
A dog’s ears, a cat’s tail, or a bird’s beak may carry more identity than the exact fur pattern. A side or three-quarter photo makes the pose legible. Ask the model to preserve those signature shapes, but check that legs, tails and accessories have support. A digital tail can appear attached in a render while still being fragile as a physical object.
Prompt direction: “Make a compact 3D brick portrait of my dog. Preserve the upright ears and curled tail, simplify the fur into three color groups, and use a stable display base.” For more capture tips, use the pet and animal guide. Our Pet Heroes illustration is theme inspiration, not a tested output.
3. Buildings: decide which view matters most
Architecture asks for a different trade-off. A single street photo may show a striking facade while hiding the roof and rear walls. Select the most important visible features—perhaps the roofline, central entrance and window rhythm—and make those priorities explicit. A second view helps when the back or roof must be accurate.
Prompt direction: “Design a small brick model of this house. Preserve the red roof, porch and three-window facade; infer the unseen rear conservatively and keep the footprint compact.” Inspect corners, roof attachments and the internal support plan before treating the proposal as a build. The architecture guide goes deeper; My City shows an original city theme.
4. Landscapes: build layers, not a photograph
Mountains, water, trees and sky contain gradients and thousands of small details. In bricks, the useful abstraction is usually a sequence of layers: foreground terrain, focal landmark, background height and a limited palette. Choose the scene’s strongest shape—a ridge, waterfall, bridge or shoreline—rather than asking for every leaf.
Prompt direction: “Turn this landscape into a layered brick diorama. Keep the curved river and stone bridge, simplify distant trees, and leave the sky as a clean backdrop.” Check whether tall elements are supported and whether the build can be assembled in sensible sections. Start with the landscape guide.
5. Vehicles: read the silhouette from multiple angles
For a car, train or spacecraft, the outline, wheel placement and key color blocks are often more important than tiny decals. A front-only photo leaves length uncertain; a side-only photo hides the nose and roof. Supply views you are allowed to use and state the scale you want. Then inspect clearances, symmetry, connection points and whether the proposed wheels or slopes correspond to real parts.
Prompt direction: “Create a display-scale brick vehicle from these references. Preserve the short hood, round headlights and orange stripe; simplify the interior and avoid unsupported thin elements.” The photo-to-bricks workflow explains how to review the resulting model and inventory.
6. Original worlds: use the image as a creative brief
A fantasy castle, robot or imagined creature may have no single “correct” back view. That freedom is useful if you give the design a clear brief: silhouette, scale, palette and one focal feature. Treat polished concept art as inspiration, not proof that every floating or curved form can be assembled with available bricks.
Prompt direction: “Use this original sketch as a reference for a compact fantasy castle. Keep two towers and the stone bridge, simplify the river into stepped blue plates, and propose a modular base.” Compare the Fantasy Castle and Future Mecha themes for creative directions. Those illustrations are explicitly concepts, not verified builds.
The same five checks apply to every subject
1. Recognition
Does the model preserve the two or three features that make the subject recognizable?
2. Hidden geometry
Which sides or interior structures were inferred rather than observed?
3. Parts and colors
Do the exported part identifiers and colors correspond to pieces you can actually obtain?
4. Connections and support
Look for collisions, floating sections, fragile overhangs and unsupported weight.
5. Assembly order
Can a person place the proposed pieces in the indicated sequence without blocked access?
Export and review
Use the model, steps and parts view as a proposal. Continue editing in a compatible tool if needed.
Image2LEGO can export LDraw model data; the official LDraw format specification describes its virtual part and model structure. BrickLink Studio documents LDraw import. Neither an export file nor a convincing render proves part availability or physical stability. Our seven-test checklist covers the manual review in more detail.
So, can you make “anything”?
Almost any permitted reference image can be a starting point for an original brick design. The practical result depends on image clarity, subject complexity, scale, missing views, the available part palette and manual refinement. “Start anywhere” is a useful creative promise; “every image becomes a ready-to-assemble set” would not be an honest one.
Try one clear image in the Image2LEGO builder, inspect the proposal from more than one angle, and decide what to refine next. If your reference includes a real person, recognizable character or protected artwork, use material you have permission to process and avoid implying official endorsement. Our public-figure guide gives a cautious starting point.